Recommendations to import a 3D scene
I-Simpa is very sensitive to the quality of 3D files. It will not accept a ‘bad’ geometry, with faces intersections, holes between faces… (in fact, the model will be imported, but some codes like SPPS will not be functional).
Step-by-step 3D scene creation, importation and test
It is recommended that users try to export their model in I-Simpa during the different steps of the model building:
Start to built your 3D model with your CAD software (the main close surface of the model);
Export the model in a 3DS file with your CAD software;
Import the 3D model within I-Simpa;
Generate a meshing by clicking on the ‘Meshing’ button on the icon toolbar: this will verify that your model is correctly built;
if user can see the mesh inside the model, it means that the model is correct for I-Simpa and that the calculation with SPPS will be functional;
if the model is not correct, return to the CAD software and try to see what is the problem (the problem is due to something in the last step of the built of the 3D model);
if the model is correct, return to your CAD software (step 0) and continue your 3D modelling, by adding objects, faces… Then, continue using the same procedure.
Note
At the importation step, I-Simpa can correct some errors. During importation check the ‘Repair model’ Import options (if not already done).
Note
If you still have trouble during importation, you can also create an approximate model by using the Import options ‘Average model remesh’. It will create a simple (or simplified) model.
Astuce
Note that, when creating a 3D model for acoustic calculations, it is not necessary to create a very complex 3D model with too many faces. You will have better results with the simple shape of your 3D model, and by adjusting correctly all acoustical characteristics of the material on the face. Make simple.
Use TetGen to identify problems in 3D models
There is a way inside I-Simpa to identify problems in 3D geometries, after importing the 3D scene.
Import your 3D model in I-simpa
Go to the “Calculation” tab of the “Project” window
Got to “Mesh” “Properties” window of the SPPS code
Check the “Test mesh topology” option (see SPPS meshing options)
Run the SPPS calculations
Faces in error will be colorized in the “Main” window. You can find information about indexes and coordinates in the “Console” window
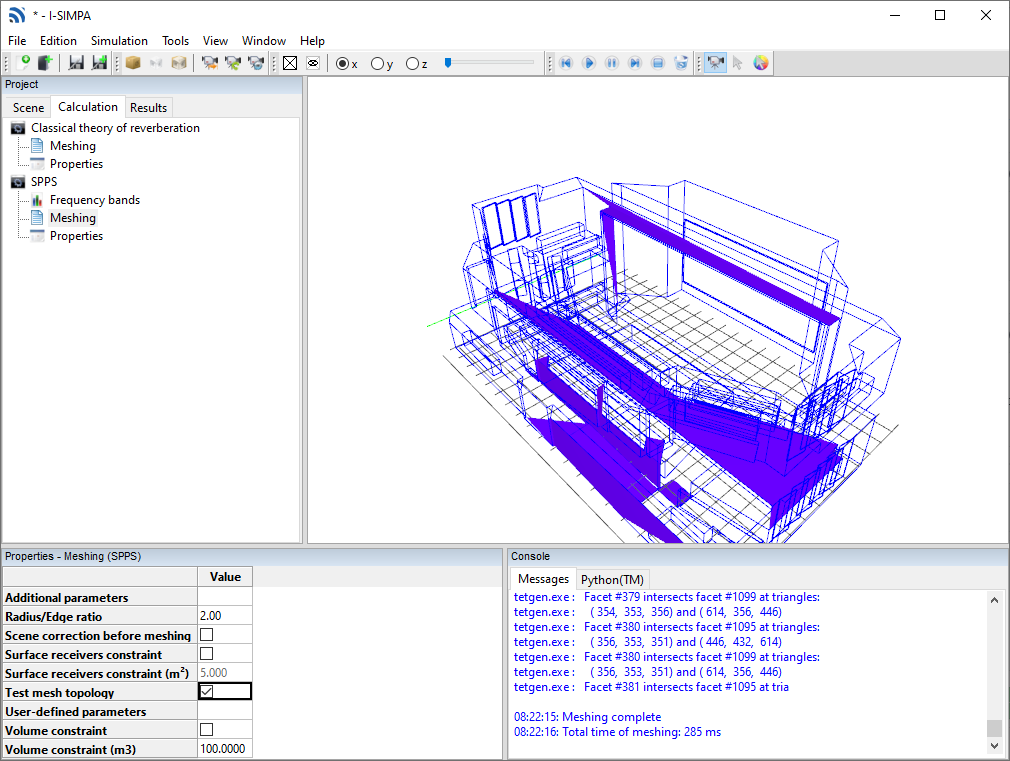
Displaying meshing errors within I-Simpa “Console” window